A professional manicure without having to leave the house, we all dream of it! Especially since with the beautiful days coming, what could be better than a beautiful nail polish to enhance tanned hands ? To be successful, a manicure does not need to be done with salon-quality equipment, although a few products are essential. So since we're pretty cool, we wanted to give you our tips and tricks for successful home manicures without stressing and without getting all over the place!
Before embarking on the realization of a homemade manicure, you must have your equipment. By material we mean:file, moisturizers, varnish, solvents for touch-ups, … What to make a beautiful manicure at home, quite simply!
For products, choose organic and natural cosmetics . Free of components considered dangerous to health, they are just as pleasant and easy to use. By using organic nail products, you are sure not to come into contact with:
Unfortunately the list of dangerous components is not finished... There are still plenty of skin irritating ingredients in conventional varnishes and solvents…
This is why all the products sold at NUOO are selected for their impeccable composition. To make their use pleasant, and to offer an experience identical to that which we know with classic varnishes, the sensory aspect is also taken into account! Organic varnishes are made with natural dyes and their colors are just as flashy, sober and of good quality as conventional ones.
Take the plunge, you won't regret it!
If you were already wearing nail polish, remove it with an organic nail polish remover . You can then let it pass for a few days before applying varnish. Waiting a little allows your nails to “rest” and gives time for the last residues of your old varnish to leave.
If you don't want to wait, be sure to clean your nails to start on a good basis. Also remember to rid your nails of the dirt that is underneath. Then follow the steps below:
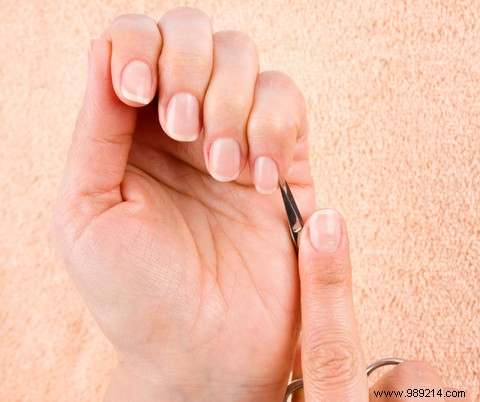
To even out your nails and give them the desired shape, prefer a nail file rather than scissors. The file, provided you choose it in cardboard and not in iron, is much softer for the nails . It respects their keratin and allows for a more discreet “cut” without bumps. To properly file your nails, start from the outside and pass the file in one direction, heading towards the center. Avoid going back and forth which could weaken your nails.
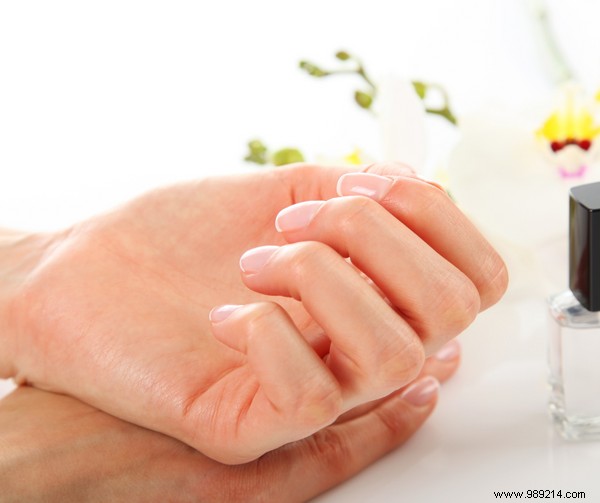
A beautiful homemade manicure is above all beautiful hands! To have beautiful hands, consider moisturizing them with organic creams or raw vegetable butters. Do not hesitate to insist when you go over your nail to hydrate it at the same time. The hydration of your nails and your hands will help the cuticles soften, and that's perfect since that's our next step!
The cuticles are the small skins that are located on your nails and which form a barrier to prevent bacteria or germs of all kinds from passing under your skin. If they are dry, they can be seen on the part of the nail that is towards the inside of the finger. Many people want to cut them and it's a big mistake! Without them, the door is open to germs and other undesirable elements. Instead of cutting them, use a cuticle pusher . Often made of wood, these small sticks are used to push the cuticles inward on the nail and thus provide a smooth surface, perfect for applying varnish .
Once your nail is clean and hydrated, there is one last step before you can start applying varnish. To erase streaks on the nails and get beautiful nails, polish them . Using a polisher, you will gently rub the top of your nail. Then pass a towel or cotton over it to remove all the nail residue that you have erased.
This step also allows you to remove a little fat added during the “hydration” step, a little higher. The oilier the nail, the less the varnish adheres.
Finally comes the time to choose natural nail polish that you are going to use. To choose the color of the varnish you can base yourself on the colors you like, on the dominant tones of your wardrobe, on the season or on the trends of the moment! With a good manicure, a varnish can last up to 2 weeks, so choose a color that you like!
The base coat it is the first transparent varnish that is applied to the nail. It strengthens, hydrates, hardens and strengthens the nail . If you want to apply a dark color, it will form a kind of barrier between the varnish and the nail and prevent the latter from discoloring it.
The base coat can very wellbe used alone for a shiny and natural finish!
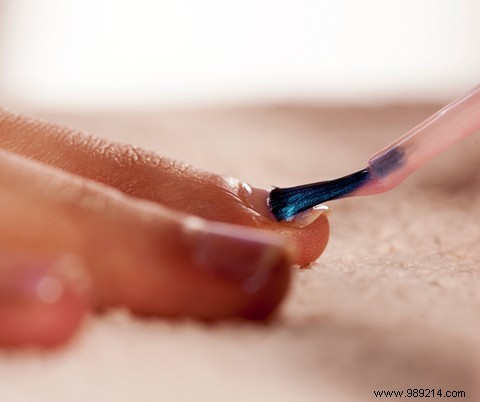
Now is the time to apply your nail polish! For a natural homemade manicure at the top several milestones:
If the varnish overflows on the skin during application, all you have to do is remove the excess using a cotton swab and a nail polish remover . Between every two poses, be sure to wait until the varnish is completely dry.
The top coat is the last step of a successful manicure. It allows you to shine the varnish while protecting it from everyday actions (washing hands, hitting the nails, washing up, gardening, etc.). With a quality top coat, you can make your nail polish last for a whole week without it moving and potentially two weeks if you take care of your hands! To apply it, dip the flat varnish brush into the jar and edge the nail:place the brush so that the bristles completely cover the nail to make only one pass.
Once your top coat is dry, you can apply moisturizer again to perfect the manicure and bring comfort to your hands!
If you follow the steps listed above correctly, you should keep your polish clean for at least a week, if not two. If you're impatient and like to change your manicure often, you can remove it whenever you want!
To do this, use an organic and natural solvent without acetone so as not to damage your nails and hands. For the bravest (or the most committed!), it is also possible to make a homemade nail polish remover! A few ingredients are enough and you are sure to know what is in it.
Once your home manicure is removed, you can start the operation again to redo one or leave your nails to rest for a few days.
Share your tips for a successful home manicure in the comments!